

I think most photographers who use an editing program such as Photoshop come to a point where they want to take that next step and create their own actions.
I'm there.
But I have PSE and there's no room in the budget for a full blown version of Photoshop.
And my tireless searches for some kind of action-hack for PSE have turned up empty.
But I'm stubborn...just ask my husband...or my parents.
And when I set my mind to something, I will find a way to do it.
With that all said, I "found" a way to create my own sequence of steps much like an action set and apply it to any photo with ease. Now, I must say that this isn't terribly brilliant and I'm surely not the first one to ever think of it, but I did come to it on my own.
When I was editing the series of Space shots from yesterday, I decided I really did not want to have to remember/repeat each step for all the images. I knew I wanted them to all look the same or at least very similar and I am all about conserving time. So, I created the look I wanted using the proper adjustments. For all of those who have asked what I did to create those images, it was simply boosting saturation and super-boosting levels of black. ;)
After I completed my steps, I deleted the background image and saved the info as a .psd file.
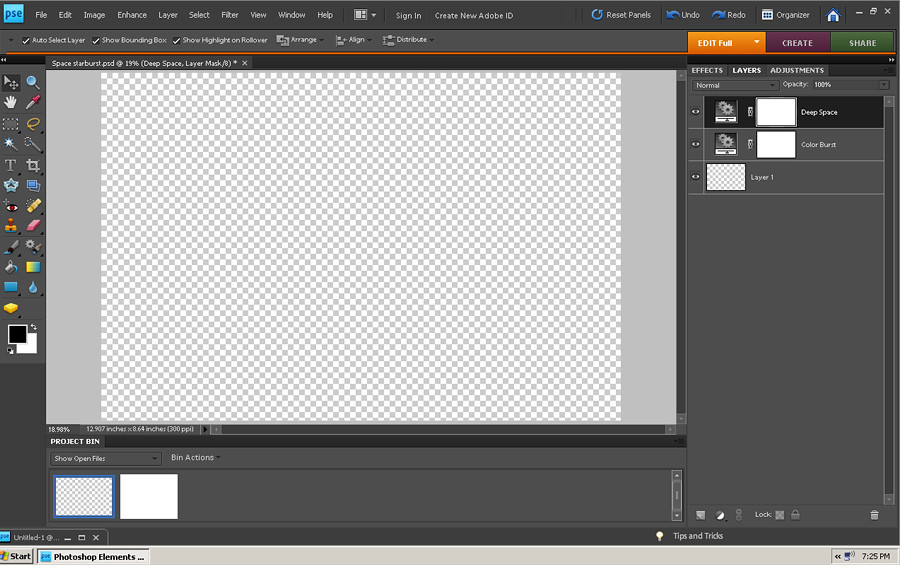
NOTE: In order to delete your background image, first you need to double click on it to make it a layer, then you must have another layer in place before the program will allow you to remove it. This other layer can be a texture overlay, a solid color overlay, or even an empty layer as I have used in the screen shot below.
These two steps are pretty much all that's needed to make your "action".
In order to run your new action, you need to open the image you want to edit, open the action file, then simply select all components of the action set and drag and drop onto your image.
And that, my friends, is a whole lotta words for something fairly simple.
Here it is all together:
Step 1. Edit an image how you like.
Step 2. Delete the background layer. (Replace with a blank layer if necessary.)
Step 3. Save as a .psd file.
Step 4. Open your image to edit and open your newly created action set.
Step 5. Select all steps from the action, then drag and drop onto the image to be edited.
Very clever! Thank you for sharing!
ReplyDeleteawesome! thanks katie! this sounds easier than i thought it would be. cheers:-)
ReplyDeleteThat's actually brilliant. Nice job Katie!
ReplyDeleteWow! That is good! I'm getting to the actions stage myself. I processed 56 elderly photos and used Gaussian blur and a mask to tone down wrinkles. Then on each photo I re-opened my watermark photo and dragged it onto my photo. Doh! I know there's a much easier way. Thanks for the inspiration. I do have Photoshop CS4, got it with a Student discount since I'm going through the NYIP courses. I got it last year a few months before CS5 released... can't justify the cost to upgrade for upgrading sake. Sometimes you can get the last version of PS at a lower price because people want to get rid of it. You're work is fantastic! I always enjoy your photos... sometimes forget to comment, sorry!
ReplyDeletei will try this way cool.
ReplyDeleteWhat a great idea!
ReplyDeleteCool! Thanks for sharing this!
ReplyDeleteWhat a brilliant idea! lol! You rock!!
ReplyDeleteToo bad I'm now mostly using LR... otherwise, I could so see me making my own pse actions! :)